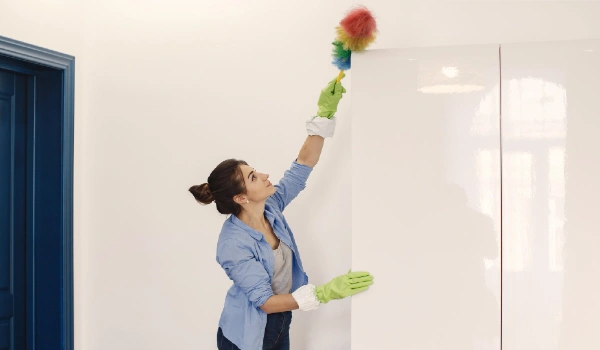
Most homeowners will clean their homes weekly, but they will forget one crucial place: the ceiling. They can remain neglected for years. Most people assume that ceilings don’t need to be cleaned – after all, gravity keeps the dust from settling on them, right? Wrong. Ceilings can collect particles from smoke, dust, cooking oils and even bugs. Cleaning them the right way isn’t just about maintaining appearances, it’s an essential practice if you want to keep your indoor air healthy.
Learning how to clean your ceilings safely and effectively not only helps improve your living environment but can also help preserve the paintwork and finishes. This article will walk you through some of the best tools, products and step by step techniques to clean different types of ceilings without causing damage to them. Whether you’re doing your annual deep clean or are preparing for a more occasional scenario like preparing for meticulous end of lease cleaning Melbourne, this guide will help you in getting everything done.
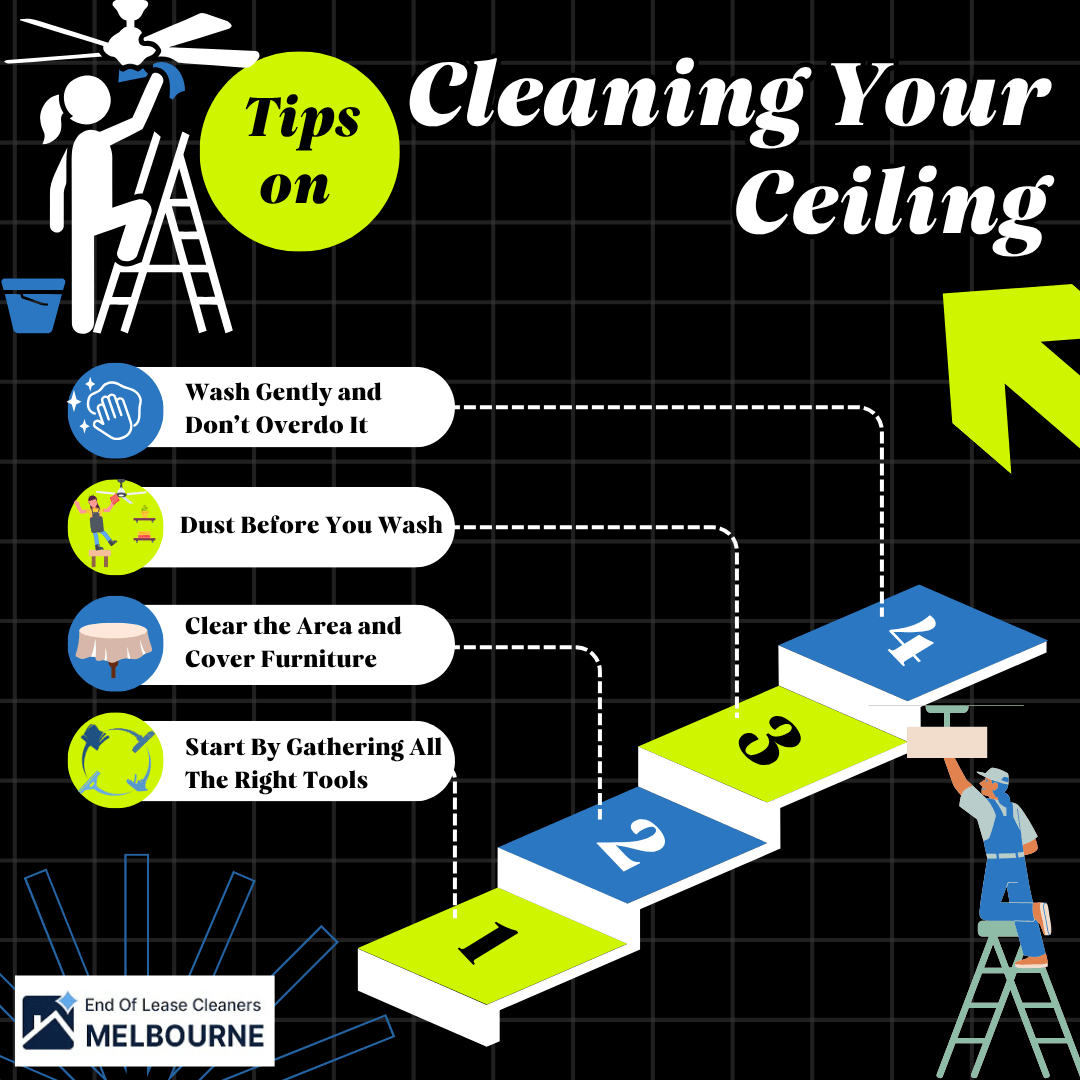
1. Start By Gathering All The Right Tools
Like any good plan, cleaning or otherwise, you need to first gather everything you will need while completing the task. In this case, gather all the cleaning tools for your ceiling: a sturdy stepladder/ platform, long handled duster, a vacuum cleaner, a mild cleaning solution, a spray bottle and a few microfiber cloths. This will prevent you from having to go back and forth between cleaning and having to look for the item you need. Bonus point, the less you have to move around, the lesser tripping hazards you expose yourself to.
If you’re cleaning a textures or popcorn ceiling, be especially cautious not to damage the finish. Avoid too much moisture and opt for dry dusting tools. For painted or flat ceilings, a light cleaning solution mixed in with water can work wonders; you can also contemplate adding a few drops of dish soap for grease prone areas like the kitchen ceiling.
2. Clear the Area and Cover Furniture
Cleaning your ceiling can cause dust and debris to fall, so it’s important to protect your furniture, flooring and any electronics. Cover items with plastic sheeting or old sheets. Remove all wall hangings and light fixtures, and anything that may get in your way. This prep work not only saves you clean up time later on, but also prevents your belongings from getting damaged in the process.
If you’re working in a large area, it helps to divide the space into sections and clean one part of the ceiling at a time. This approach prevents you from missing out any spots and also makes the task more manageable. You’re less likely to get overwhelmed this way.
3. Dust Before You Wash
Dry dusting should always be your first step in the cleaning process. Use a long handled duster or a vacuum with a brush attachment to remove the cobwebs, dust and loose debris. Focus on the corners and around ceiling fans and vents as these areas are dust magnets that often get left behind during normal cleaning routines.
If the ceiling is particularly dirty or hasn’t been cleaned in quite a while, dust might fall as you go, so it’s a good idea to wear protective eyewear and mask to avoid breathing in the particles. For those of you, who are doing this as a part of their comprehensive End of lease cleaning Melbourne checklist, this step is crucial to avoid smudges or streaks when the wet cleaning begins.
4. Spot Treat Stains and Marks
Once all the dusting is done, inspect the ceiling for any stains, watermarks or grease spots. Use a slightly moistened microfiber cloth and a gentle mixture of water and dish soap to dab away marks. Avoid scrubbing the area too hard, especially if the surface is older or is painted, as this can lift the paint away or cause it to fade out.
Mould or mildew stains, which are quite common occurrences in the bathroom or poorly ventilated areas, can be treated with a vinegar and water solution. Spray the solution lightly onto the affected ceiling area and wipe with a clean, soft cloth. Always spot test a small, hidden section first, to ensure there is no damage or discolouration.
5. Wash Gently and Don’t Overdo It
For the general washing stage, fill up a spray bottle with a mild cleaning solution (such as diluted vinegar or dish soap in warm water) and lightly mist small sections of the ceiling with it. Use a damp (but not soaking) microfiber mop or sponge to lightly wipe the surface in circular motions. Avoid over saturating the surface, as too much moisture can seep through and damage the ceiling or even create mould problems later on.
Be especially careful around electrical outlets. If your ceiling has vents or down lights, avoid spraying near them and wipe carefully by hand. If you’re unsure about the ceiling material or have high ceilings that are difficult to reach without the proper equipment, it may be worth investing in a specialist service like quality End of lease cleaning Melbourne. They have the tools and training needed for doing a flawless job, cleaning the ceiling safely and meticulously.
6. Don’t Forget Ceiling Fans, Lights and Vents
No ceiling cleaning job can be complete without tackling the ceiling fans, light fixtures and vents. These features often accumulate thick layers of dust and grime over time, and can easily spread around the room when they are in use. For the ceiling fans, you can use microfiber cloths or old pillowcases to slide over each blade and trap the dust. Light fittings can also be wiped with a damp cloth, just make sure they are switched off before you do so.
Air vents should be vacuumed and if they are detachable, rinsed in warm soapy water before being reattached again. Including these details is particularly important when doing an end of lease clean, where even minor oversights can cost you your bond amount. That is why many tenants tend to opt for expert End of lease cleaning Melbourne services, to ensure all these little but important areas are dealt with appropriately.
Tips on Cleaning Your Ceiling
Wrapping Up
Cleaning your ceiling may not be easy but it’s well worth the investment. You’ll be surprised at the difference it makes to your home’s cleanliness and air quality. The right approach to the task can leave your ceilings looking fresh and your living spaces healthier. It’s a small job with a big impact. Happy Cleaning!