Picture your kitchen exhaust fan spinning freely and your rangehood filter shining silver again; that is exactly what property managers also expect at a final inspection. If yours are currently coated in grease and dust, do not panic. You just need a few tips and tricks to restore them both to a bond worthy condition. With the right approach, you can lift away months of built up grime and bring these often ignored fixtures back to life. A thorough clean now can save you from unnecessary deductions and last minute stress on inspection day.
Taking the time to properly clean both the exhaust fan and rangehood filters is one of the easiest ways to protect your bond and leave the kitchen looking freshly maintained. This article will walk you through the simple steps to get them spotless, efficient and inspection ready. And for renters looking for extra support, many choose to book top quality end of lease cleaning Melbourne services to ensure every detail meets the required standard. By following the guidance below, you’ll be well prepared for a smooth and successful handover process.
- Understanding What Needs Cleaning
- Clean Rangehood Filters with Hot Water and Dish Soap
- Degrease the Exhaust Fan Using Baking Soda or Degreaser
- Freshen the Rangehood Housing with a Microfibre Wipe Down
- Restore Shine to the Outer Hood with Vinegar
- Deep Clean Ceiling Exhaust Fans with Soapy Water
- Replace Old Filters When Cleaning Isn’t Enough
- Infographic: Ways to Clean Kitchen Exhaust Fan /Rangehood Filters
- Wrapping Up
1. Understanding What Needs Cleaning
Most rental kitchens have either metal mesh filters or baffle filters, both of which are designed to catch airborne grease before it enters the fan. These filters trap oil in layers, meaning that over months of cooking, they become coated in sticky buildup. Some properties, especially older rentals, may have ceiling mounted exhaust fans instead of a rangehood. Regardless of the configuration, both the filters and fan components must be cleaned to fulfil inspection criteria.
Beyond this, the property manager will also likely inspect the entire rangehood unit. This includes the hood's underside, fan blades (if accessible), light covers, buttons or switches, and any surrounding surfaces. All of these acquire grease over time, so be thorough. Understanding all this prevents you from accidentally missing places that inspectors typically examine thoroughly.
2. Clean Rangehood Filters with Hot Water and Dish Soap
The simplest and most dependable method for cleaning rangehood filters is to soak them in very hot water mixed with dishwashing solutions. Hot water softens the oil and loosens dirt, caught between the mesh layers. Using a deep sink, tub or bucket allows the filters to be completely submerged. Using a liberal amount of dish soap helps to break down greasy residue more effectively. Allowing the filters to soak for at least 20 to 40 minutes, helps the solution to effectively dissolve thick dirt.
After soaking, use a soft scrub brush or non scratching scourer, to carefully remove any leftover accumulation. Avoid using wire brushes, since they can break the mesh and degrade the filter's efficacy. After scrubbing the filters, rinse them under hot running water, to eliminate any remaining soap. Allowing them to air dry completely before reinstalling keeps moisture from entering the fan housing. Regularly cleaning these filters not only helps you satisfy bond requirements, but also enhances airflow in the kitchen.
3. Degrease the Exhaust Fan Using Baking Soda or Degreaser
If the inside of the exhaust fan is accessible, it will most likely require a more thorough cleaning than the filter. Baking soda is an excellent and natural way to break down sticky grease. Mixing it into a paste with a little water and applying it to greasy areas, allows it to lift the grime without damaging the surface. Leaving it to sit for a few minutes helps the paste penetrate thick, sticky oil before wiping it away with a damp cloth.
For tougher cases, a commercial kitchen degreaser may be necessary. Spraying a light layer on the fan blades or surrounding housing and letting it settle briefly can dramatically loosen hardened residue. While wiping, gently rotate the fan to safely reach each blade. This process provides a thorough cleaning while, keeping moisture from entering electrical components. Professional cleaners who specialise in affordable end of lease cleaning Melbourne, may use a combination of these approaches, depending on the level of the accumulation.
4. Freshen the Rangehood Housing with a Microfibre Wipe Down
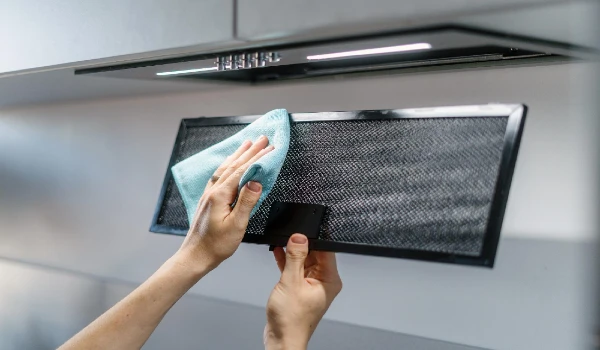
The inside and outer housings of the rangehood, can accumulate a surprising quantity of grease. A microfiber towel is great for wiping these surfaces since it collects oil, rather than spreading it. Begin by spraying a light cleaning solution on the housing or applying it directly to the cloth. Wipe slowly, paying special attention to corners and edges where grease accumulates. If there are still sticky places, repeat the process.
A second wipe with a clean, moist cloth helps to eliminate any residue, left by the cleaning agents. Some places, particularly the bottom of the rangehood, may require more attention because it is closest to the stovetop. Cleaning these elements not only improves the appearance of the appliance, but it also exhibits attention to detail, which property managers always value during a final inspection.
5. Restore Shine to the Outer Hood with Vinegar
Vinegar is a great natural way to polish, stainless steel or glass rangehood exteriors. Diluting vinegar with water and applying it with a spray bottle helps dissolve grease and reduce streaks. Wipe the surface in the direction of the stainless steel grain to achieve a clean, uniform finish. This easy procedure usually results in a visible shine, that makes the item appear freshly fitted.
For glass surfaces or plastic coverings, vinegar also works well as a streak free cleaner. A second wipe with a dry cloth leaves the surface polished and free from fingerprints or smudge marks. Polishing the exterior hood is a simple but significant step because it is the first thing an inspector will notice during the tour. A sparkling exterior, can make the entire kitchen appear cleaner.
6. Deep Clean Ceiling Exhaust Fans with Soapy Water
In older rental properties, ceiling exhaust fans often replace traditional rangehoods. These units typically have plastic covers that can be easily removed and washed in warm soapy water. Soaking the cover softens grease and loosens dust that has built up over time. After washing, letting the cover to completely dry, helps prevent dust from clinging when reinstalled.
The fan blades themselves require care. To remove dust and grease, gently wipe each blade with a moist cloth and mild detergent. Avoid pouring liquid directly onto the fan, since moisture may get into the electrical components. Cleaning the surrounding ceiling area can also make a difference, especially if smoke stains have built up. Even though these older systems are simple, they still require thorough cleaning to pass a bond inspection, and this level of detail is often emphasised during expert end of lease cleaning Melbourne services, too.
7. Replace Old Filters When Cleaning Isn’t Enough
Sometimes filters are simply too clogged, damaged or worn out to be restored, even after soaking, scrubbing and degreasing. If the mesh is warped, the metal is discoloured beyond repair, or grease remains trapped deep inside the layers, replacing the filter is the fastest and most inspection friendly solution. New filters are inexpensive, easy to install and instantly improve the look and function of the rangehood, helping ensure your kitchen meets bond ready standards without unnecessary effort.
Infographic: Ways to Clean Kitchen Exhaust Fan /Rangehood Filters

Wrapping Up
Cleaning your rental’s kitchen exhaust fan and rangehood filters is a simple but essential step for a smooth bond return. By eliminating oil, washing the housing and ensuring that the fan and hood look clean, you demonstrate to the property management that the kitchen has been well maintained. A little effort spent on these areas, can make a significant difference during inspection and help you return the property in outstanding condition.